FTP Client Configuration
How do I configure FileZilla?
Once you have chosen FileZilla as your FTP client, you can use the following step by step guide to help you configure it with the proper settings.
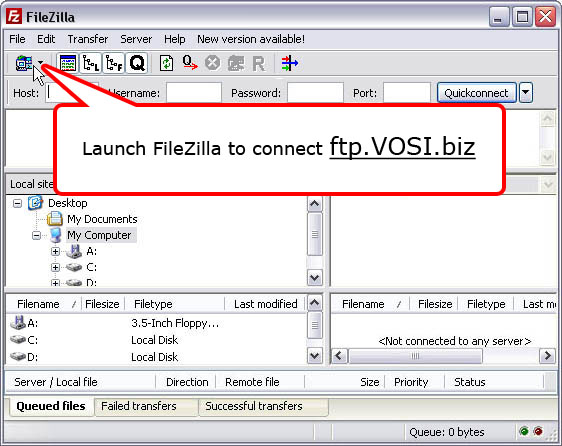
1) Launch FileZilla. To configure your site, open the Site Manager by clicking on the icon in the top left corner.
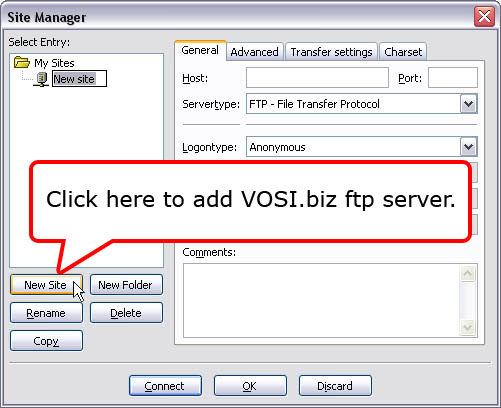
2) Enter a name for your Website where it reads "New FTP site."
3) Next fill in the "Host" field with "ftp.vosi.biz." The "Servertype" should be set to "FTP." Change the "Logontype" to "Normal." Fill in the "User" field as your username in VOSI.biz, then enter your password below your username.
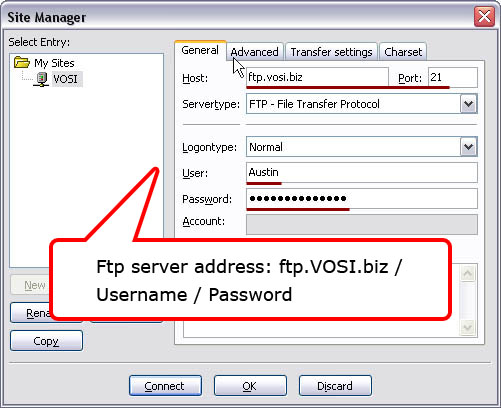
4) You're done! Press the "Connect" button on the bottom of the screen to connect to your server.
How do I configure Fetch?
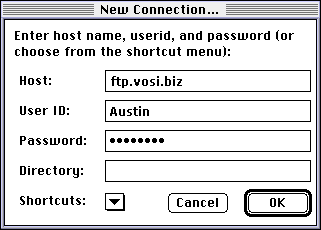
Fetch is the granddaddy of FTP programs for the Macintosh. It's also easy to configure and use. Fill out the below information when you launch Fetch and are presented with a New Connection... dialogue:
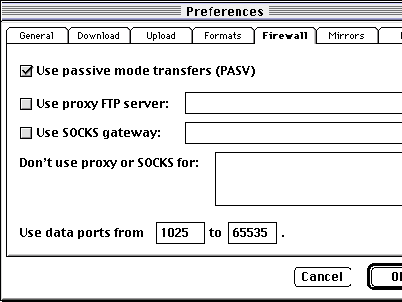
You can optionally click on Customize, Preferences, choose the Firewall tag, and select Use passive mode transfers. This provides better compatibility for users who are behind a proxy server or firewall, and will not adversely affect the performance of Fetch regardless of how you connect to the Internet.
How do I configure Cyberduck for Mac OS X?
Cyberduck is a free FTP program for Mac OS X only. Once you have chosen Cyberduck as your FTP client, you can use the following step by step guide to help you configure it with the proper settings.
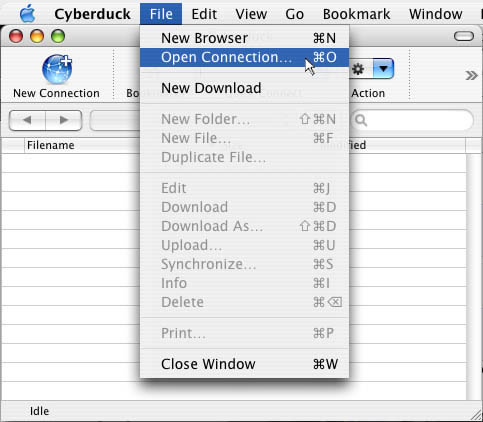
1) Open Cyberduck. Go to your "File" menu, and select "Open Connection."
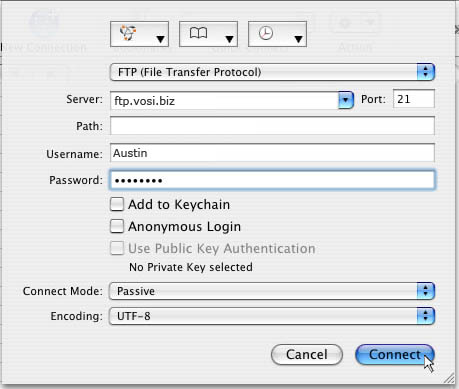
2) Next you will be prompted for all of your login information. First enter the Server, ftp.VOSI.biz. Next specify your Path, which is /. Enter your Username, which is your username in VOSI. Next enter your password. Press the "Connect" button.
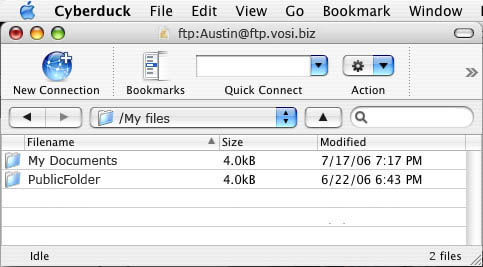
3) You're done! Your ftp files should have appeared in your Cyberduck window. Now you are free to drag and drop files between Finder and Cyberduck.
